The Administration Panel
The Manager Settings screen consists of six tabs each containing unique functions:
- Administration panel
- Reports Security
- Driver Comm
- Order History
- Editors
- Menus
|
Note: The settings area of Rameses allows you to customise system settings – special care should be taken when making any changes! Note that some settings may not be activated or available in the edition you have purchased. Please contact us for more details. |

Shop Details
Click Shop Details to access the Shop Details screen. Most of the information should already be filled in for you, such as user name, company name, address, post code. You might want to add some more details such as your VAT number, for example.
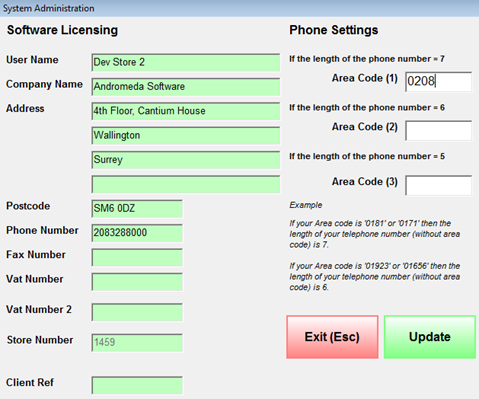
Note: You should never delete or try to change the USER NAME field.
Vehicles
Click the Vehicles button to access the Vehicle Maintenance screen.
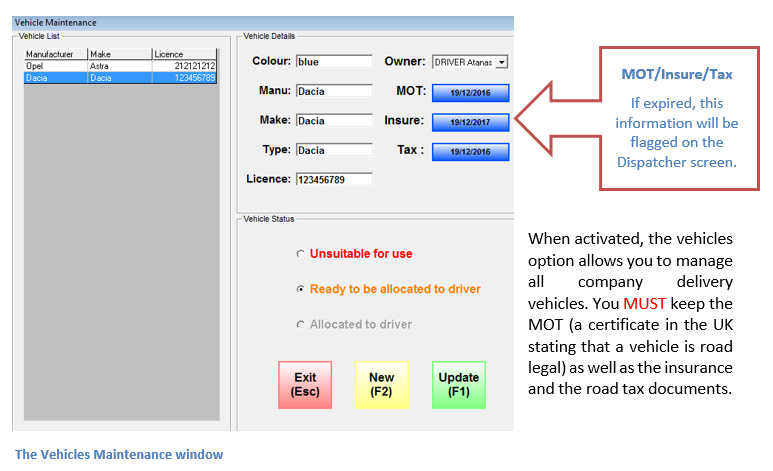
If the MOT/Insurance/Tax document is out of date, you will not be able to assign the vehicle to a driver.
To add a new vehicle to the list, click the New (F2) button.
Award Float to Employee (Driver)
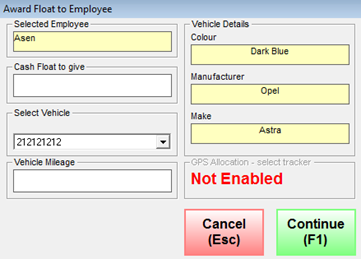
When you award float to a driver (see Dispatcher Menu) you will also need to assign a vehicle to that driver. In this case Vehicle Tracking must be enabled.
This can only be done after you have done the start of day process.
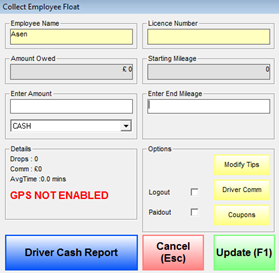
When you collect the float from a driver (Vehicle Tracking enabled) you will also be shown the following:
Licence Number - the licence plate of the vehicle that was assigned.
Starting Mileage – the starting miles/kilometers of the vehicle.
Enter End Mileage - a field to enter the finishing mileage of the vehicle.
Enter new or changed information and click Update (F1).
Table Planner
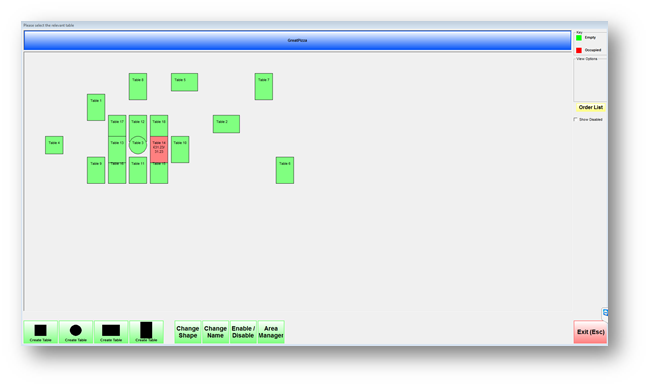
This setting allows you to create a table plan for your restaurant. You can change the shape and name of the tables.
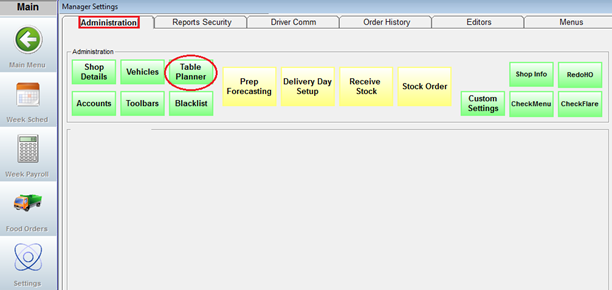
Go to Manager Settings > Administration tab and click on the Table Planner button, see below.
Then, you can click on the Area Manager button to create separate table plans for different areas of your restaurant – hall 1, hall 2, garden, terrace, etc.
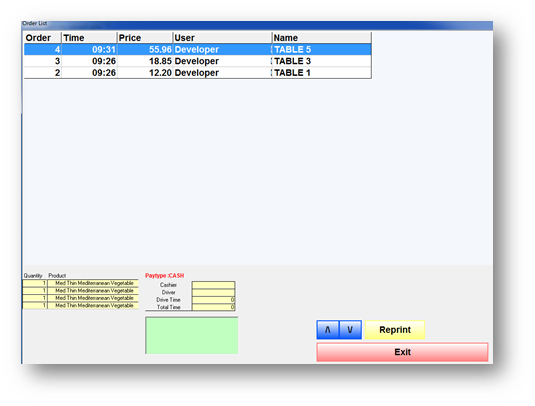
Click on the yellow button Order List to view all orders in the restaurant and their details, as shown below - the time the order was made, the order price, the table it is to be served, etc.
Accounts
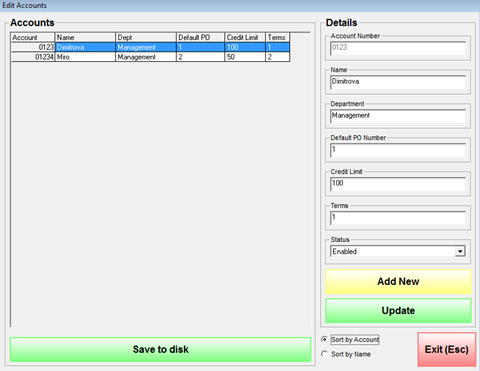
This function allows you to create accounts and give them credit limit. When you have filled in all fields click Save. If you want to edit information, alter the field(s) first and then click Update.
Toolbars
This screen allows you to change the required user access level needed to view different parts of the system. Use the dropdown boxes on the left-hand side of the screen to alter the accessibility or the menu buttons.
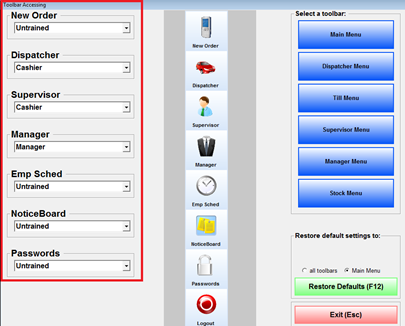
Use the green Restore Default (F12) button to reset the menu accessibility to the original settings. Tick either the ‘Main Menu’ field to reset the Main Menu toolbar or tick the ‘all toolbars’ field to reset all toolbars.
Then click Restore Defaults (F12) and you will be prompted to continue.
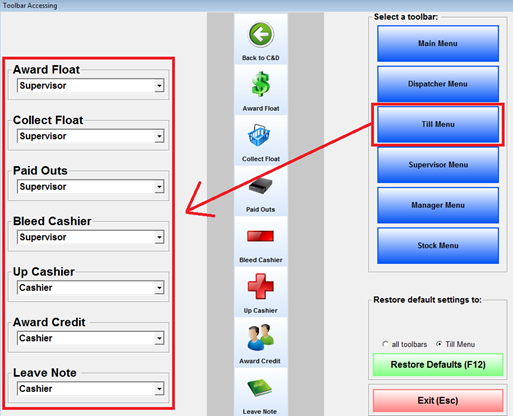
Select the toolbar you wish to edit from the Select a toolbar area. The toolbar for the menu you have selected will be displayed on the left of the screen:
Blacklist
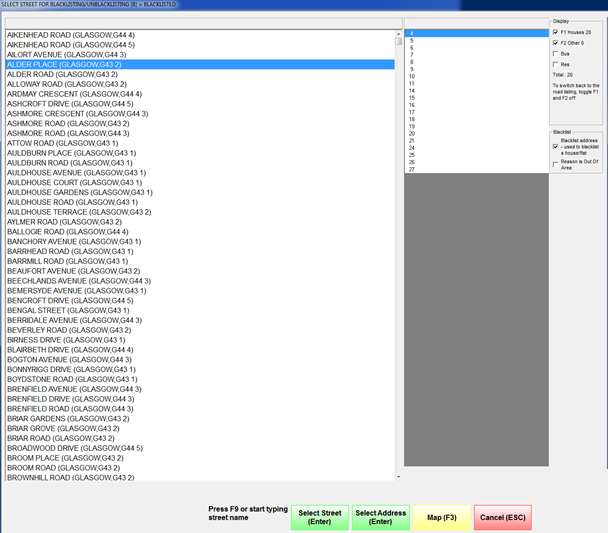
The Blacklist button is located under the Table Planner button.The Blacklist function is used for blocking certain streets or houses from your delivery area (you can also blacklist from the Customer Details Screen in order taking.
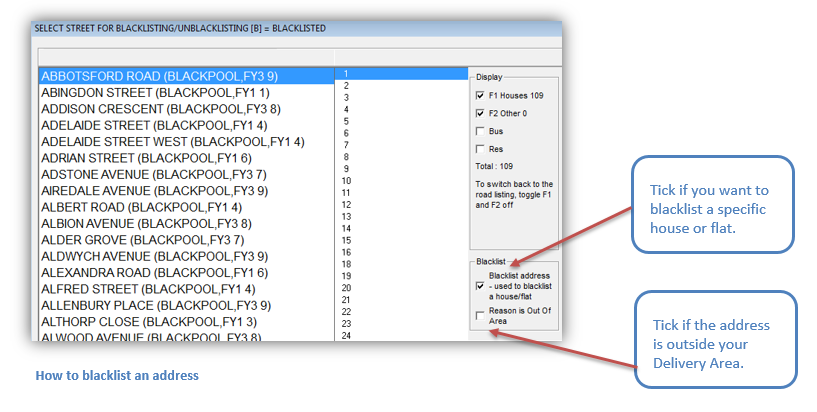
To blacklist a specific house or flat, tick the Blacklist address – used to blacklist a house/flat box and you will be presented with further options for picking an individual address.
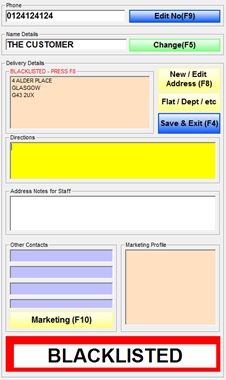
Once a location has been blacklisted it will still be in the road list. A message - BLACKLISTED - will be displayed to inform you that the road or address is blacklisted.
However, you will still be able to place the order if you want to.
Reasons for blacklisting could range from addresses being outside your designated delivery area (tick the Reason is Out of Area box) or related to certain problematic customers.
You can blacklist specific houses/flats or entire roads.
After you have selected the road name that you wish to blacklist click the Select Street (Enter) button. This will blacklist an entire road.
Prep Forecasting, Delivery Day Setup, Receive Stock, Stock Order - under development.
Custom Settings
All Custom Settings are explained in detail in a separate document. They are usually used by Andromeda Implementation and Help Desk Teams so please consult with them first if you want any changes/settings to be made.
Custom settings are mainly intended for users with Manager and Owner access.
Shop Info
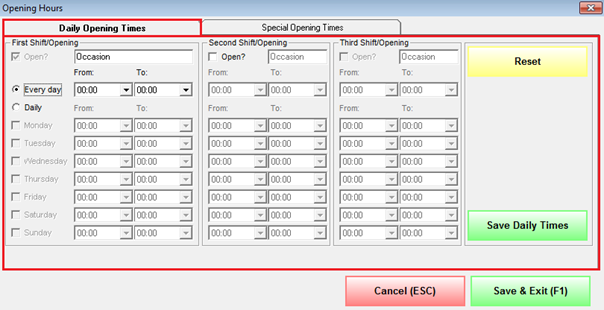
Click the Shop Info button to access the Opening Hours configuration section. From here you can set the opening times of your business. This information is displayed on your website if you have Rameses web ordering. Click the Reset button if you would like to reset the currently set opening hours.
Daily Opening Times
Once you have filled in the daily opening hours for your business click on Save Daily Times to save the changes made to the schedule. To finalise the changes made click on the Save & Exit (F1) button.
Special Opening Times
This option allows you to configure the opening times of your business for special days, i.e. days which differ from the normal day to day schedule.
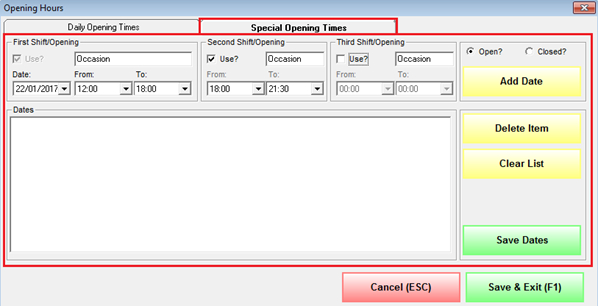
- The Add Date button - Once you have selected a particular date from the calendar and you have set the opening hours for that day, you may click Add Date in order to add it to the list.
You may add multiple special days to the opening times schedule using this list.
- The Delete Item button – click on it to remove a particular day from the list.
- The Clear List button - clear the entire list of special opening times currently set. Click on the Save Dates button to save the changes made to the schedule.
RedoHO
Click RedoHO if you want to override and manually send data for AMS and polling purposes.

CheckMenu
When changes are made to menu they are uploaded to FTP and come into effect upon restart (and usually in the morning on the next day). By clicking this button you download the latest menu changes from the FTP and apply them right away.
CheckFlare
This function was developed upon special customer request.

 9.69 MB)