Employees
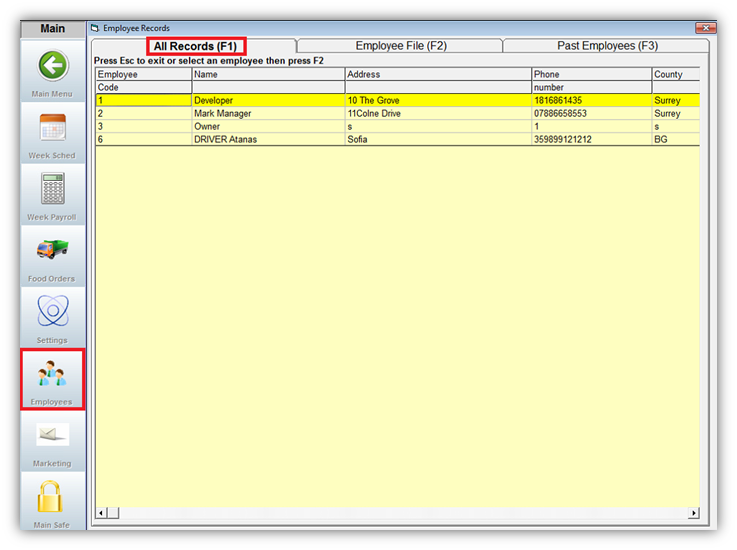
From the Manager Menu click the Employees button. The ‘All Records’ screen will then open. This screen shows the Employee Code, Name, Address and Phone Number and helps you control your employee documentation.
From this screen press the Esc key to return to the Manager Menu or F3 to progress through the tabs.
Adding a New Employee
Select the Employee File (F2) tab. This will open the pre-selected Employee File.
To add a new employee click the Add Employee button on the Employee File screen. This will open a blank Employee File:
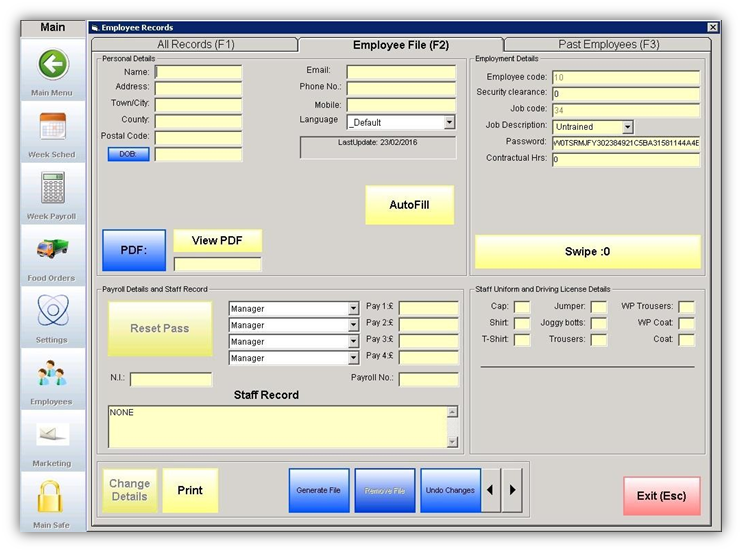
Enter the Employee’s name in the ‘Name’ field. All fields must be filled in before you can generate a new employee file.
If you are in a rush or plan to fill in the Employee details later, you can click the AutoFill button and all ranges will be automatically completed with non-specific data, as shown below.
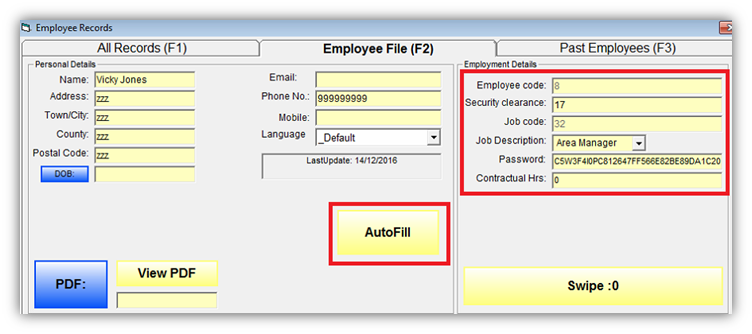
If you use the AutoFill button, be advised that the ‘Job Description’ field in the Employment Details section MUST be set to the correct Job Description. An employee with untrained status will be prevented from using Rameses.
The Employees Details, shown on the right above, have the following functions:
- Employee code – the number of the employee entered into the system.
- Security clearance – automatically assigned by the system.
- Job code - automatically assigned by the system.
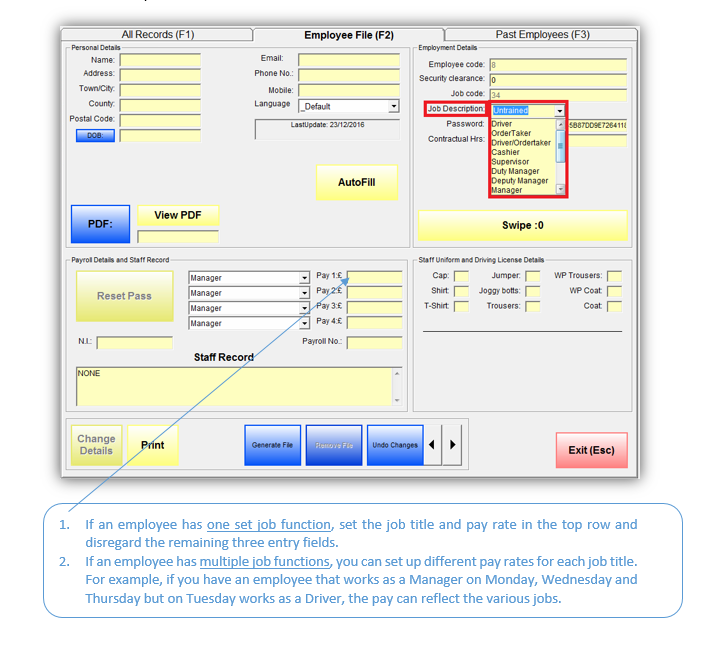
- Job Description – the Manager must select a job title from a dropdown list. Then, the Job code and Security clearance will be automatically assigned by the system.
- Password – automatically generated by the system. Field not to be used by the Manager.
- Contractual Hrs – hours discussed or already in contract.
Note: All new Passwords default to PASS and should be changed by the employee immediately.
After the employee details have been entered click the Generate File button at the bottom of the screen. When the file is generated it will deliver a prompt to confirm.

Click the Yes button to save the employee file to the database.
Click the No button to return to the Employee files- the file will not have been saved to the database.
Editing an Existing Employee
From the ‘All Records’ page, select the file that you wish to edit and click the Employee File (F2) tab. This will open the selected Employee File.
To alter the employee’s details, click the Change Details button at the lower left hand side of the screen.
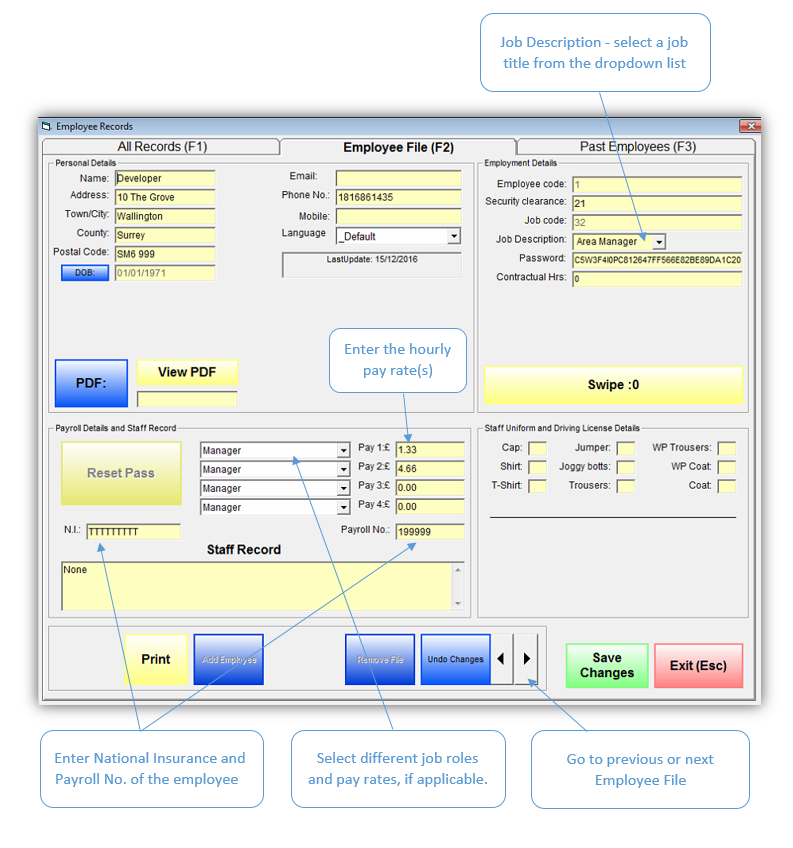
Enter all details in the relevant fields.
The Job Description Field
After selecting the appropriate Job Description from the dropdown list, all the other fields will auto fill to the appropriate codes and clearance for that position.
Once you have changed the employee details click the Save Changes button. By clicking the Exit (Esc) button you will be returned to the Manager Menu and any unsaved changes will be lost.
Click the OK button to save the changes to the system. If you click the Cancel button, you will be returned to the original employee file and your changes will be lost.
Note:
You must have relevant employee wages setup correctly for payroll use.
Removing an Employee File
Select the file of the employee that you wish to remove and click the Remove File button.
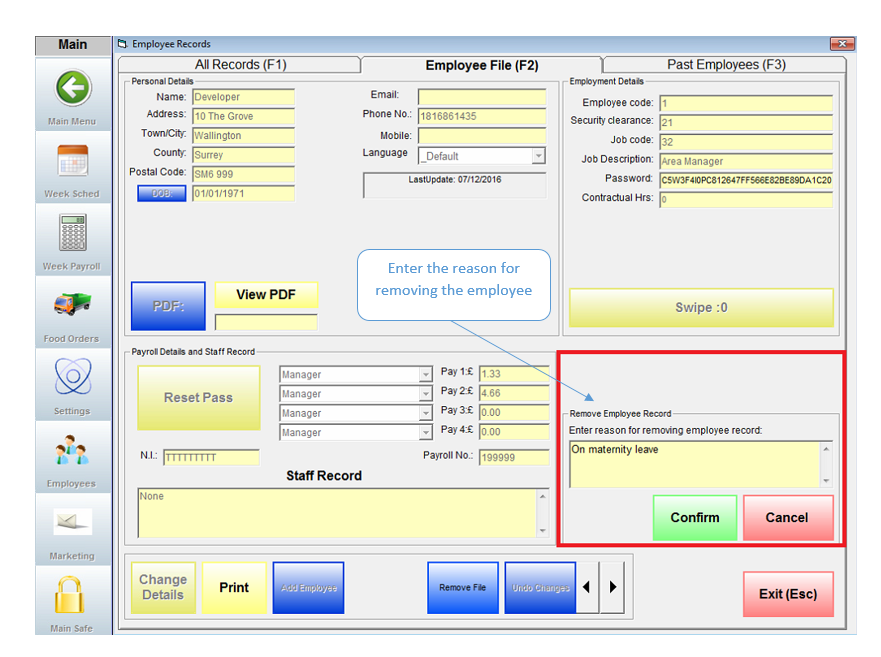
You cannot remove a file if you do not enter a reason in the Remove Employee Record field.
After entering the reason for removing the file, click the Confirm button and the Employee file will be moved to the ‘Past Employees’ section of the Employee File Menu.
If you click the Cancel button, you will be returned to the employee file and the file will not be removed.
Past Employees and How to Reinstate an Employee File
The Past Employees screen shows the details of all employees that have left and the date at which they were removed from the system. If an ex-employee returns to work, you can Reinstate the Employee rather than create a new file.
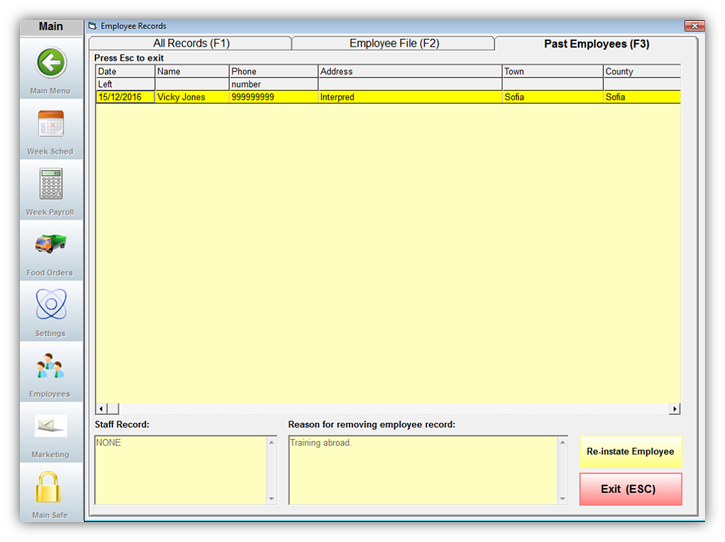
How to reinstate an employee:
- Select the employee from the Past Employees screen
- Click the Re-instate Employee button
Now the employee file will be returned to the All Records screen and can be edited as normal.
Note: Don't forget to change the job code and password after reinstatement.
