Marketing
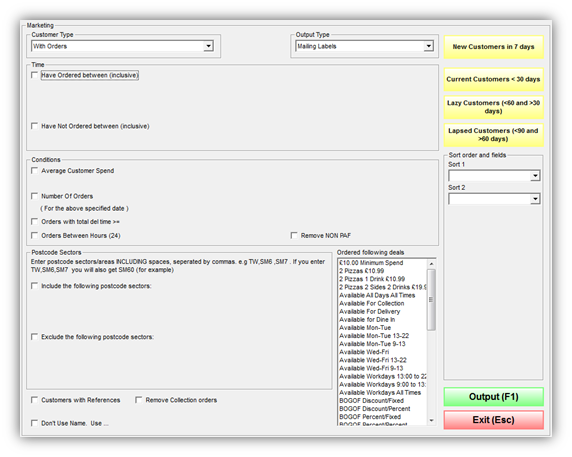
From the Manager Menu click the Marketing button. This is your own in-house marketing tool. This will open the Marketing screen, which provides various options for refining your search criteria.
If you click the Output (F1) button without selecting any of the search fields, you will be presented with a list of everyone who has ever ordered.
To create a specific list of customers, alter the parameters to refine your search by ticking the small boxes to the left.
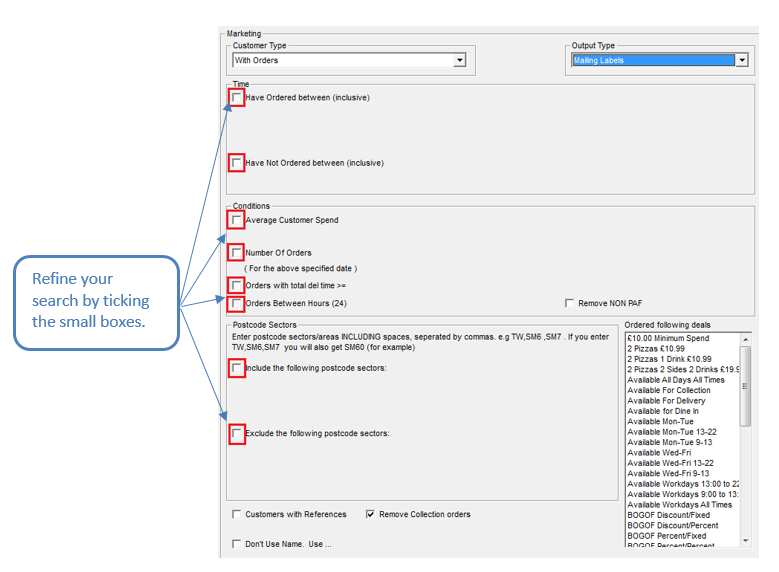
After ticking the boxes new fields will appear to help you refine your search. They are explained below.
Have Ordered between (inclusive) and Have Not Ordered between (exclusive)

The option SMS output is a chargeable add-on.
This function allows you to find out which customers have or have not ordered within a certain period.
For example, if you wish to see a list of customers who have purchased from you between 1st Jan - 16th Jan 2017 you would tick the box ‘Have Ordered between (inclusive)’ and enter the relevant dates.
If you wish to see a list of customers that have not made a purchase between 7th Nov - 7th Dec 2016, tick the box beside ‘Have Not Ordered between (inclusive)’ and enter the dates.
This helps you find lapsed/regular customers and target them with the right marketing campaign.
Average Customer Spend and Number of Orders
You can further narrow your search by specifying for customers who spent an average amount that was greater than > or less than < an amount of your choice, as shown below.
You can also set it so that it shows customers by the number of orders they have placed. This allows you to see customers who have ordered greater than >, less than <, greater than or equal to >=, less than or equal to <=, or equal to = a number of your choice.

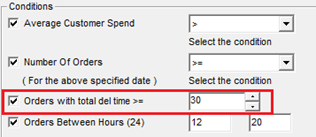
Orders with total delivery time
This shows all customers who received their orders above the selected time. Use the arrows to increase or decrease the delay time.
Now when you click the Output (F1) button all customers who have had a delay in service equal to the time specified will be listed.
Orders Between Hours (24)
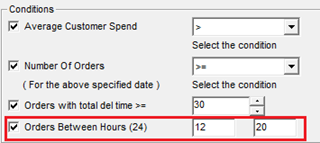
This function is used for viewing all orders placed within a certain time period by setting the start time and the end time. Enter the start and end time in the field.
Now when you click the Output (F1) button all orders that have been placed starting from 12:00 and ending at 20:00 will be listed.
Include/Exclude the following postcode sectors
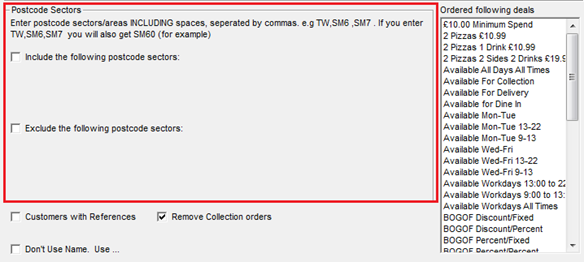
Customers can be grouped and included (or excluded) from the Output according to the post code area in which they live. Enter the postcode sector in the blank fields.
Now when you click the Output (F1) button all the customers living within the postcode sector specified will be listed.
If you wish to be even more specific you can look up the exact postcode and see all customers who live within the specific sector.
Ordered following deals
Use this menu to search for customers who have ordered particular special offer or menu in the past.
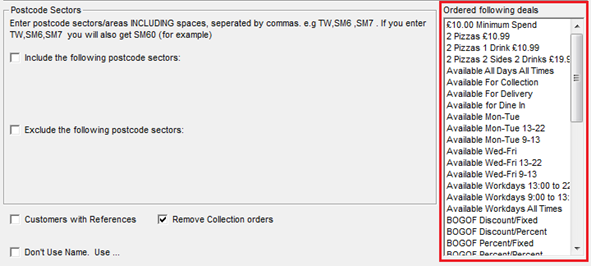
Scroll up and down to locate the required special offer. Then click on Output (F1) to come up with a list of all the customers who have ordered this particular offer in the past.
Customers with References
Tick this box to come up with a list of all the customers, who have a reference saved in the system in regards to a particular order. Now click on Output (F1) in order come up with a list of all the orders, made by customers with a reference saved in the system.
Remove Collection Orders
Tick this box to create a list of past orders, excluding the orders which have been collected by the customers and not delivered. Now click on Output (F1) in order come up with a list of all the past orders, excluding the orders which have been collected by the customers and not delivered.
Don’t Use Name. Use…
If you wish to use a title other than the customer’s name as it is entered in Rameses, you can use the ‘Don’t Use Name’ function. Normally the names appear as they are entered in Rameses.

If you tick the box and enter the title you wish to use all customers will be shown with the same name or title you have just entered. Now, when you click Output (F1) the customer names have been altered to the word/name/title you just designated. This can be very useful when making address labels.
Four additional options
There are four more buttons on the right-hand side of the Marketing screen marked in yellow:
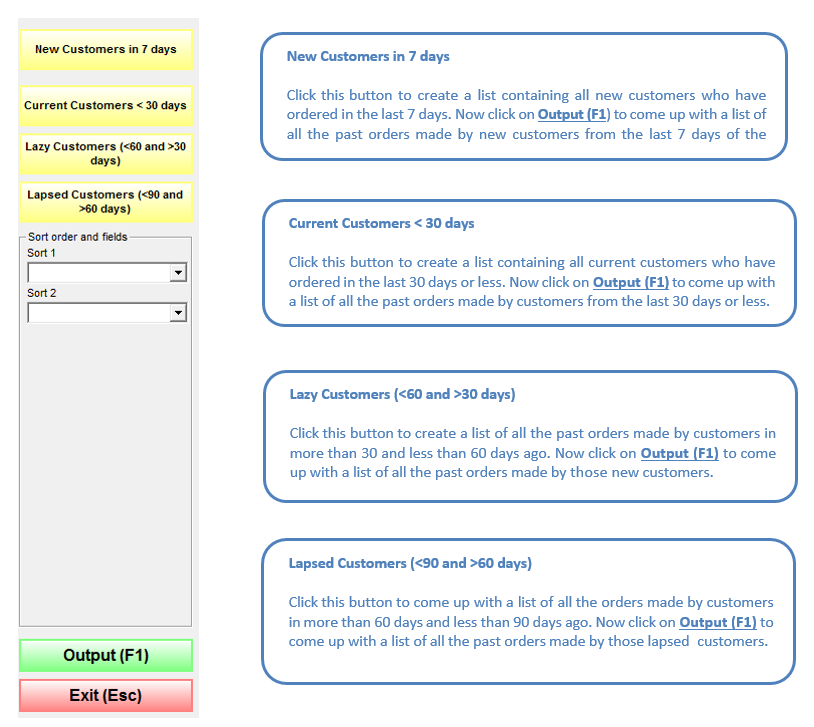
The Sort Order and Fields
Use the Sort order and fields options to set a particular order in the way past orders are listed.
For example, if you select Mailing Labels from the Output Type dropdown options and then:
- ‘Name’ from the Sort 1 field and
- ‘Post Code’ from the Sort 2 field, as shown below:
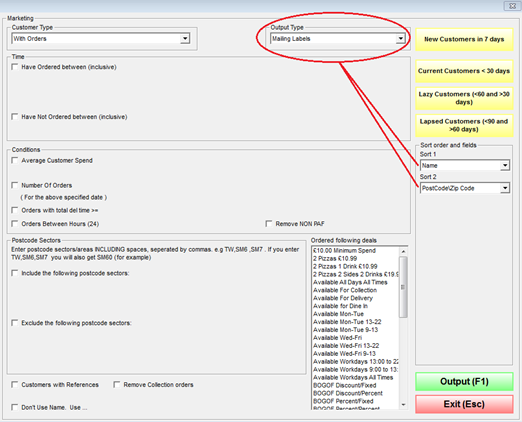
Now click Output (F1) and you will get the following list with customers:
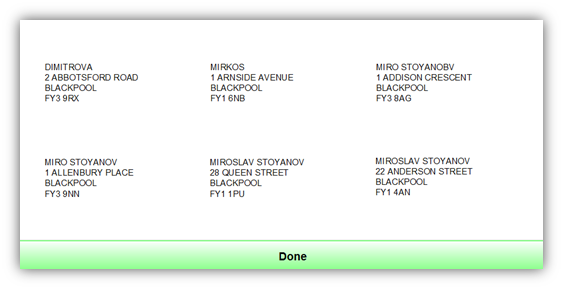
As can be seen customers are arranged alphabetically first by their names and then by their post codes.
This option can be very useful when making address labels.
