Weekly Schedule
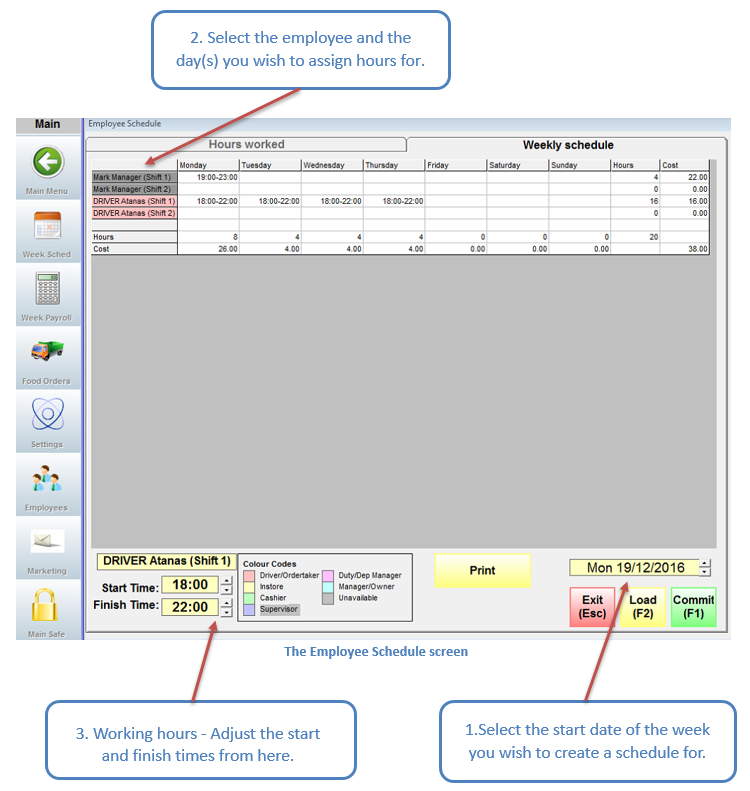
From the Manager Menu, click Week Sched. The Employee Schedule screen will then open. This allows you to build a schedule for your team.
Once the schedule is saved (Commit F1), it then reflects start times in TimeKeeping and tracks punctuality. Rather than repeating your schedule every week, you can load it to future weeks and then edit as required.
Please note that additional fees may apply to enable this functionality.
Creating a schedule
The figure below shows a few simple steps to follow when you create an employee schedule.

Note:
(Shift 1) - refers to the regular working hours of the employees.
(Shift 2) – is used for а different rate which is additionally set in the Custom Settings options.
Saving a Schedule
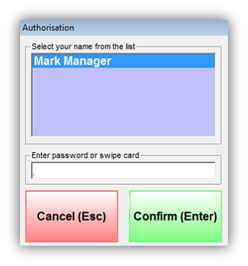
Once you have completed and are satisfied with your schedule, click Commit (F1) to save the schedule. Management authorisation will then be required before the schedule can be committed.

Enter your password, then click the OK button and you will be returned to the Employee Schedule screen.
Printing a schedule
If you wish to have a hard copy of the schedule, click the Print button. An A4 printer must be connected to and installed on the machine in order to print the schedule.
Reloading an Old Schedule
If you have committed a schedule and then accidentally changed it, you can click the Load (F2) button or press the F2 and it will pull back the last committed schedule.
Click Confirm (Enter) after inputting your password and the original schedule will be reinstated.
Click Cancel (Esc) to leave the Authorisation Form and return to the Employee Schedule screen with the schedule changes still in place.
|
Note: Clicking Cancel (Esc) from the Employee Schedule screen without first committing a new schedule will return you to the Manager Menu and your new schedule will NOT be saved. |
